• The site has now migrated to Xenforo 2. If you see any issues with the forum operation, please post them in the feedback thread.
  • An addendum to Rule 3 regarding fan-translated works of things such as Web Novels has been made. Please see here for details.
  • Due to issues with external spam filters, QQ is currently unable to send any mail to Microsoft E-mail addresses. This includes any account at live.com, hotmail.com or msn.com. Signing up to the forum with one of these addresses will result in your verification E-mail never arriving. For best results, please use a different E-mail provider for your QQ address.
  • For prospective new members, a word of warning: don't use common names like Dennis, Simon, or Kenny if you decide to create an account. Spammers have used them all before you and gotten those names flagged in the anti-spam databases. Your account registration will be rejected because of it.
  • Since it has happened MULTIPLE times now, I want to be very clear about this. You do not get to abandon an account and create a new one. You do not get to pass an account to someone else and create a new one. If you do so anyway, you will be banned for creating sockpuppets.
  • Due to the actions of particularly persistent spammers and trolls, we will be banning disposable email addresses from today onward.
  • The rules regarding NSFW links have been updated. See here for details.

Cooking Thread~ Recipes & Things

Taylor's Poutine Recipe - Biigoh
So I posted a recipe in Goblin Queen on SB. I thought it fair that I post it here too.

.
***
.
For those who are hungry and wonder just what Taylor made for the Undersiders, here's a little recipe that features deep-fried fries, poutine gravy and white cheddar cheese curds all tossed together. Do be careful with deep frying. A proper deep fryer is recommended.

Please note that this recipe serves 8, divide proportions of ingredients in 1/2 for smaller meals.

.
- - -
Goblin Queen | Interlude : Taylor's Poutine Recipe
Worm / Exalted
- - -
.​
Ingredients

Poutine Gravy:
4 Tbsp. (60 ml) cornstarch
4 Tbsp. (60 ml) water
12 Tbsp. (180 ml) unsalted butter
1/2 cup (120 ml) unbleached all-purpose flour
4 cloves garlic, finely chopped
40 oz. (1136 ml) beef broth
20 oz. (568 ml) chicken broth
Pepper, to taste

Deep Fried Fries:
4 lbs. Russet potatoes (6-8 medium potatoes)
Peanut or other frying oil

Toppings:
2 - 3 cups white cheddar cheese curds (for authentic poutine. Torn chunks of mozzarella cheese would be the closest substitutation)
2 - 3 scallions, thinly sliced/chopped (optional)
1 sprig cilantro, thinly sliced/chopped (optional)

Cooking Instructions
Gravy First
1 - In a small bowl, dissolve the cornstarch in the water and set aside.

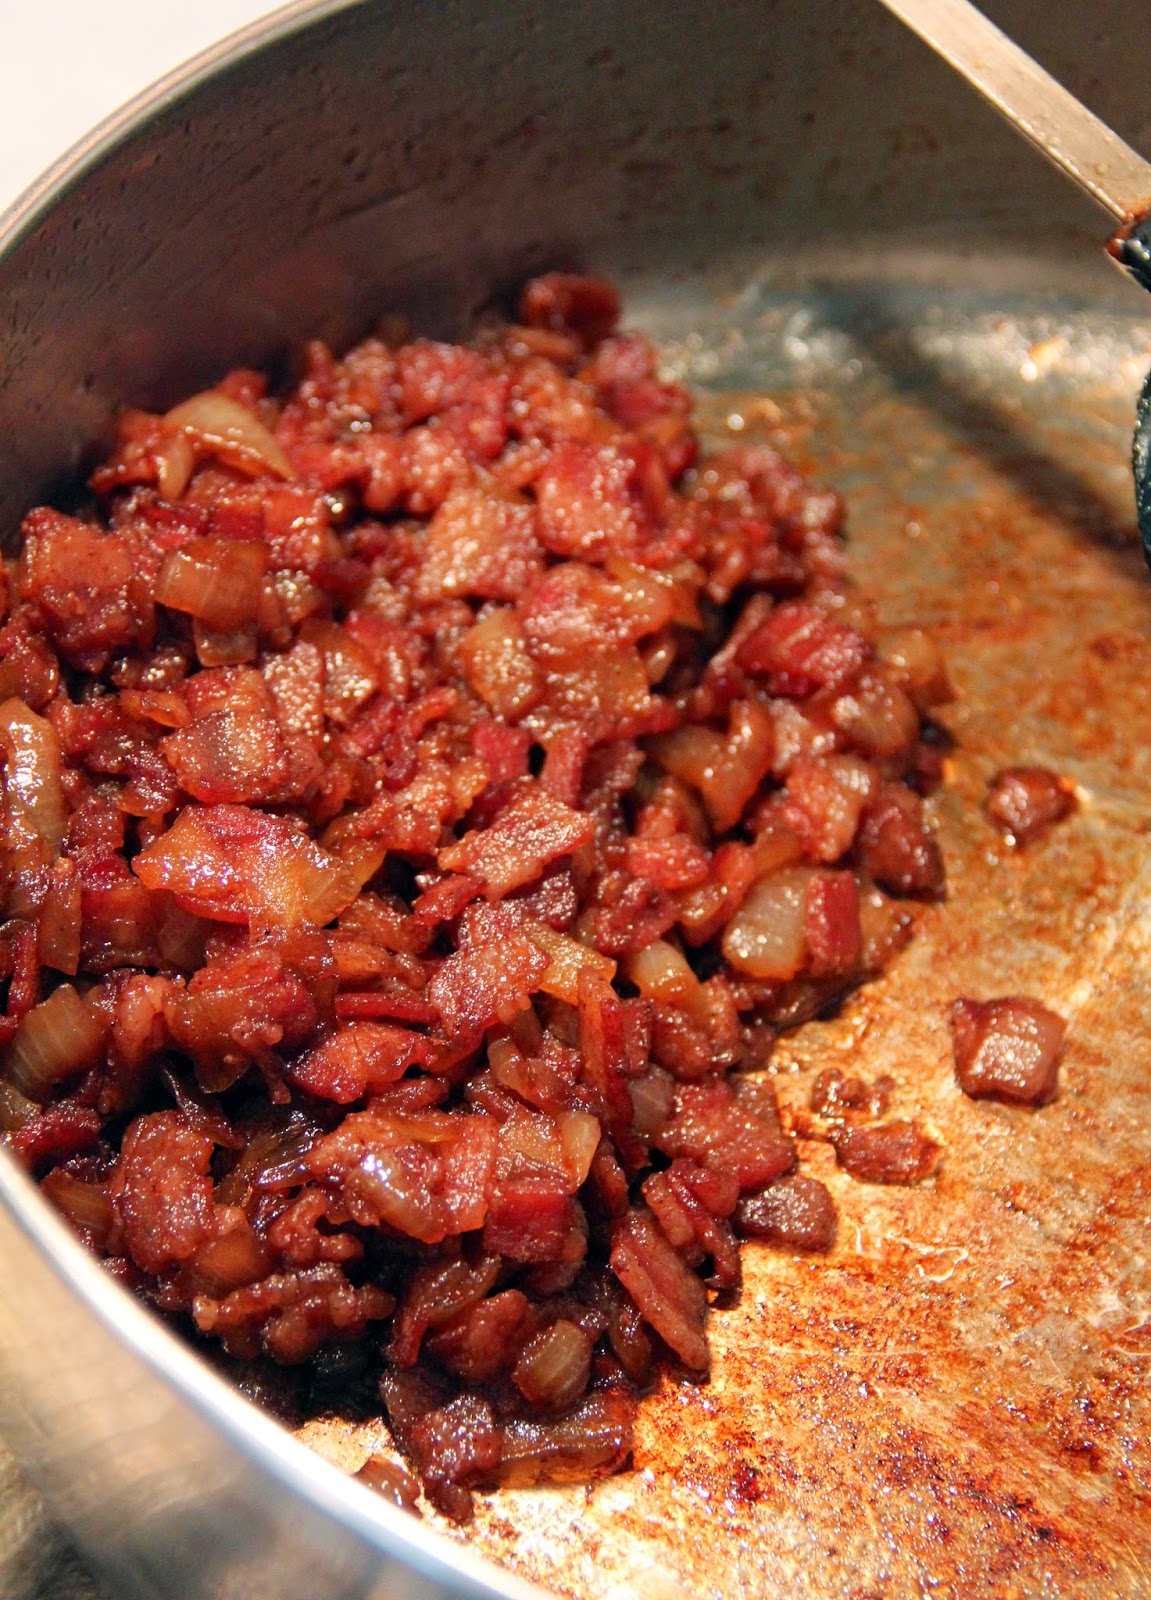
2 - In a large saucepan, melt the butter. Add the flour and cook, stirring regularly, for about 5 minutes, until the mixture turns golden brown. Add the garlic and cook for a further 30 seconds.

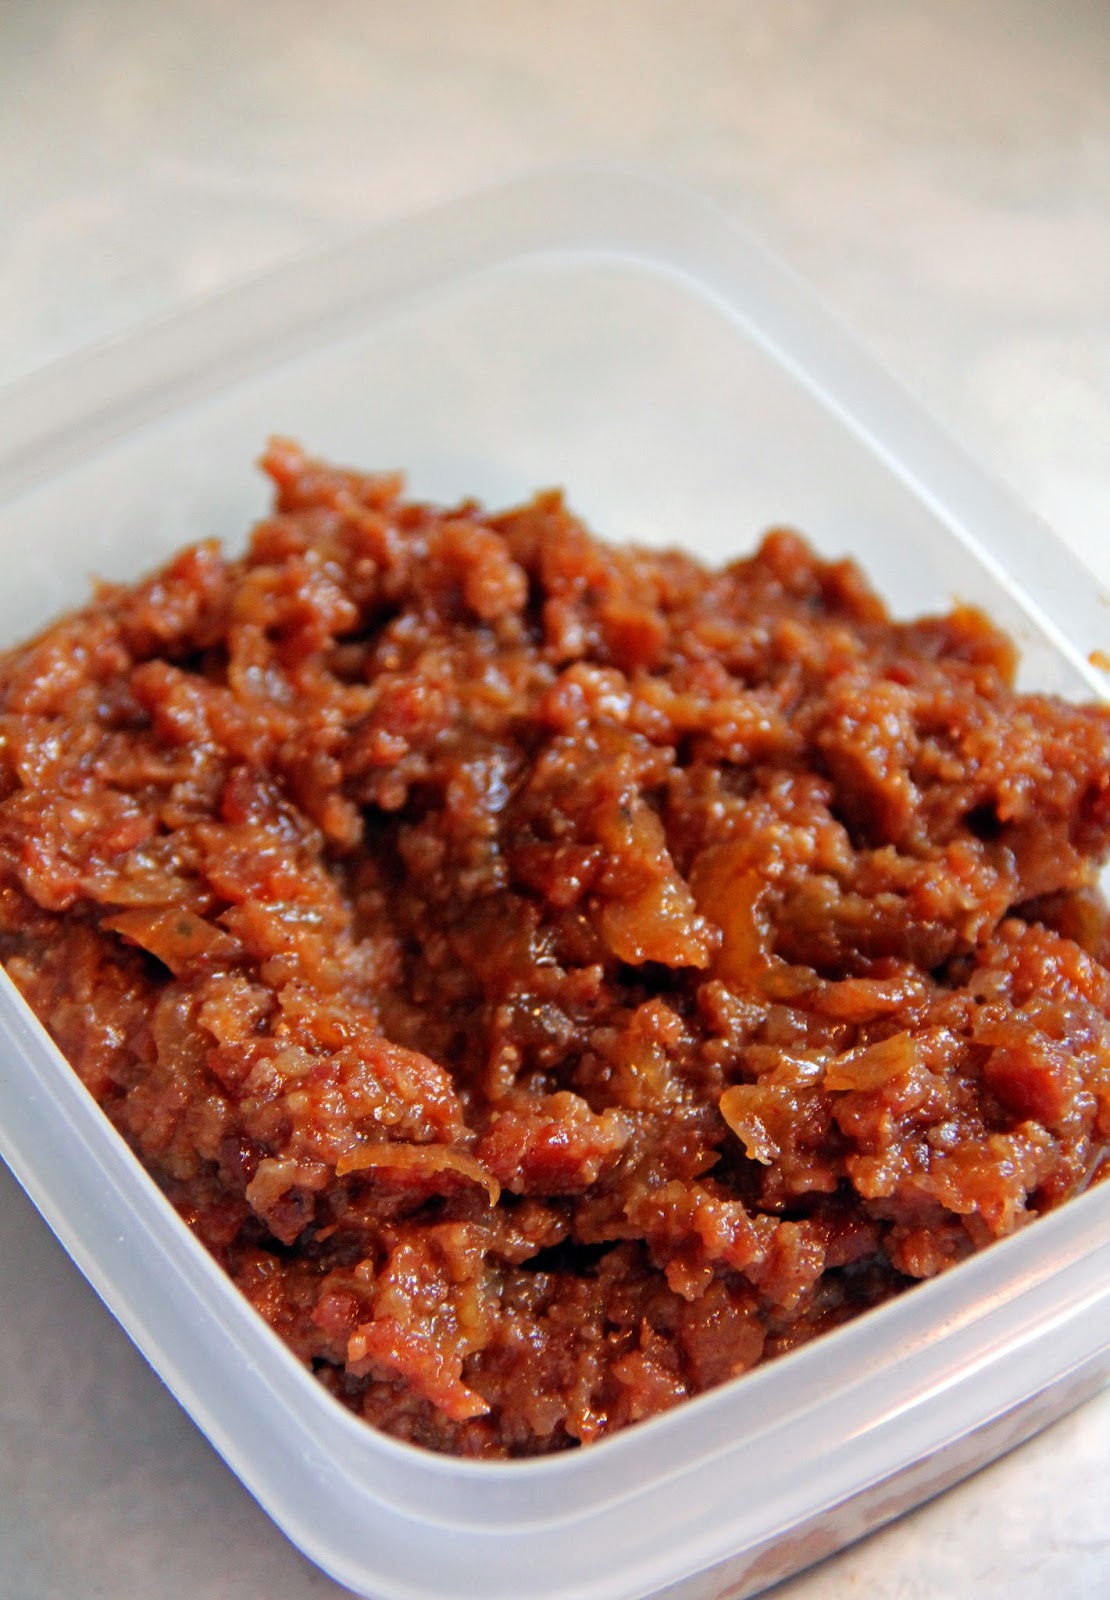
3 - Add the beef and chicken broth and bring to a boil, stirring with a whisk. Stir in the cornstarch and simmer for 3 to 5 minutes or until the sauce thickens. Season with pepper. Taste and add additional salt, if necessary, to taste. Make ahead and re-warm or keep warm until your fries are ready.

Fries Second
4 - Prepare your potatoes and cut into 1/2-inch thick sticks. Place into a large bowl and cover completely with cold water. Allow to stand at least one hour or several hours (up to 24 hours). When ready to cook, heat your oil in your deep fryer or large, wide, heavy cooking pot to 300° F.

5 - Remove the potatoes from the water and place onto a sheet of paper towel. Blot to remove as much excess moisture as possible.

6 - Add your fries to the 300° F. oil and cook for 5-8 minutes, just until potatoes are starting to cook but are not yet browned. Remove potatoes from oil and scatter on a wire rack. Increase oil temperature to 375° F. Once oil is heated to that temperature, return the potatoes to the fryer and cook until potatoes are golden brown. Remove to a paper towel-lined bowl.

Poutine Time
7 - Add your fried or baked fries to a large, clean bowl. Season lightly with salt while still warm. Add a ladle of hot poutine gravy to the bowl and using tongs, toss the fries in the gravy. Add more gravy, as needed to mostly coat the fries.

8 - Add the cheese curds and toss with the hot fries and gravy.

9 - Add cilantro and scallion to the top. Serve with freshly ground pepper. Serve immediately.
 
Pizza - Vindictus
1 Extra-Thin Pizza Shell
1/2 lb mild Italian Sausage
1/4 lb Mozzarella, grated
1/4 lb Cheddar, grated
1/2 large bottle Marinara
3 Tbsp Sriracha

Sautee sausage, drain grease. Preheat oven to 425. Grease pizza pan, place shell on it. Spread Marinara and Sriracha on shell. Add sausage, then cover with cheese.

Bake 12 minutes.

Remove from heat, cool, and slice.
 
Bacon - Selias
Best bacon I've ever had.

Rather than using a pan, heat up a pot on a burner. After it's hot enough, cut your strips of bacon into three pieces (you can make more, but I find that thirds are the best size), and put them into the pot. Don't cover the pot. After that, just let it cook, and you'll have some nice, crispy bacon. It works best if you use a lot of bacon, and a relatively small pot, since the grease will basically deep-fry the bacon.
 
Deviled eggs - Darthdavid
Just made some deviled eggs that came out pretty good as a sorta early mother's day thing, thought I'd share:

What you need:
9 XL eggs*
Mayo
Mustard
Paprika
Ranch Dressing (optional)
Salt (optional)
Vinegar (I used white wine but any kind should work. Pickle brine also works well in place of plain vinegar)
A stove
A pot
A slotted spoon (or something you can fake it with to scoop eggs out of hot water)
A fork
A knife
A good sized bowl
Something to put your eggs on or in
Water

It's best to use eggs that have been in your fridge for a week or so. If they're too fresh they're harder to peel. I did 9 here because we had that many left in the older carton and it was a good amount of eggs to fill up our deviled egg platter + a few extras for 'quality control'. This is one of those recipes that doesn't take that much more work to do a big batch than a small one so you'll probably want to do the biggest batch you think you'll eat before they go off so you get the biggest reward for your effort.

Get a pot big enough to fit all your eggs in a single layer at the bottom. Fill it with cold water to about an inch above your eggs. Leaving the pot uncovered for now, bring to a full boil over high heat. Once the pot's boiling good, cover and remove from heat. Let it stand for 15 minutes.

When the 15 minutes starts going down, fill a bowl with ice water (just cold will do if you don't have an ice maker or whatever, but ice is better here). Once the time is up, transfer the eggs from the hot water to the ice water. I find a slotted spoon works well for this. Let them cool for at least 5 minutes.

Get your eggs out of the bowl and empty the water. If you only have one big bowl or you don't want to make more dishes, dry the bowl out now, cause you'll need it again in a bit.

Peel your eggs. I like to put down a paper towel, lightly tap them around the wide end on the counter to crack them at the air pocket there and then gently roll them a bit under my palm to crack them up all around before peeling off the shell, using the membrane to help get big swaths of it in one go then rinsing them under cold water after to get any shell fragments that may be left off but everyone has their own techniques for this. Experiment a little, you'll find something that works for you. If you actually want them to look fancy the first time you're doing this you'll probably want to make a few extras cause you'll probably screw up an a egg or three. If you don't care about looks they'll still work fine unless you absolutely mangle them though.

Once all your eggs are peeled, slice them in half the long way. Pop both halves of the yolk out into your bowl and lay the whites out on your tray or whatever you're using with the hole where the yolk went facing upwards. Using a fork, crumble up all the yolks fairly finely. Add 1/2-3/4 of a cup of mayo (depending on the consistency you want), a bit of ranch dressing (to taste) if you like (use slightly less mayo if you do), 1&1/2 tablespoons of mustard, a pinch of salt (if you like) and one tablespoon of vinegar. Stir it all together until it's nice and creamy.

Use the fork to fill in all your eggs. You may need more utensils to properly clear out the bowl. With the extra material each egg should be heaped a bit.

Lightly sprinkle your eggs with paprika. You can eat them at this point, but they're better if you leave them in the fridge to chill for a while before you do.
 
Last edited by a moderator:
Polish style potato pancakes - Darthdavid
Thought I'd add another thing I made today, polish style potato pancakes:

What you need:
Lots of potatoes
Onion
Flour
Eggs
Salt and Pepper
Oil (usually use canola)
A peeler
A grater (or a food processor that can stand in for one)
A stove
A nice big mixing bowl
A frying pan

Optional:
Lemon juice*
Cottage Cheese or Applesauce to garnish them once they're done


So this is another recipe where a big batch isn't much harder than a small batch. And you'll definitely want to go big for these, they're pretty labor intensive to do so leftovers make the whole thing much more rewarding. This is also probably something you'll want help with. One person can do this, but it's a lot easier if you have 2-3 people to divvy up tasks between.


The actual doing is fairly simple: peel and coarsely grate up your potatoes and onion, add eggs, flour and a bit of salt and pepper. Ratios are 2 eggs and 2-3 tablespoons of flour + 1 small-medium onion (or half a big onion) for every 2 pounds or so of potatoes. You want just enough egg and flour to bind it without making it taste super eggy or floury. Stir it all up well then let it sit in your fridge for 10-15 minutes or so. This gives the mixture a chance to set up a bit.

Once it's set you'll want to heat up a generous amount of oil in a skillet. You're not trying to deep fry these or anything but it should definitely be well coated. Medium to Medium-High heat works well. Once it's nice and hot add a couple pancakes. Each one should be about 1/3 of a cup worth of your mixture. Cook till it's golden brown on both sides then put on some paper towels to cool a bit and soak up excess oil before eating. You'll want to rotate the pancakes in place a few times on each side so they cook evenly all around and you'll need to add a bit of oil between batches.

They go really well topped with applesauce or cottage cheese but are also good plain. You could probably put other stuff on there too I guess.

*if you're doing a big batch you can add a small amount of lemon juice to your potatoes every so often as you're grating and mix it through to prevent the potatoes oxidizing and going all bluish, doesn't actually hurt anything if they do though so this is strictly optional
 
Simple Seared Fish / Simple Risotto - UrsaTempest
Simple Seared Fish

It is less recipe and more technique, I guess. Yes, yes, searing won't seal the juice or something like that, but it will result in juicier fish. Go bug actual chef for reason.

Anyway, you will need:

A fish. I usually use tuna, but I think other kind of fish can be used as well.
Salt.
Vegetable oil. I use palm oil, but that's more because it is the most widely-available one, here.

A large skillet/frying pan. Sticky one is far preferable, but non-stick is possible.
Stove. Obviously.

Optional:
Pepper. I always forgot to add one, but salt is enough anyway.

Process:
1. Fillet the fish. Cut it further to your preference - do make sure it is at most 1 cm thick, which is, err, 3 inches, I guess? Why can't we use metric?
2. Make sure the fish's surface is as dry as possible. Use paper towel, or even tissue, to dry it.
3. Sprinkle salt at skin side of the fillet. Left it for 20 minutes or so.
4. Add oil to your frying pan. I use something like two tablespoon per 4 fillets.
5. Turn on your stove, to the hottest possible. Wait until the oil is smoking. Then Immediately put the fish on the pan, skinside down.
6. Let it be for couple minutes. After 3/4 is cooked (look at the side of the fillet), flip it.
7. Turn off your stove - the remaining heat should be enough to cook your fish.
8. Transfer it to plate; add pepper, if you wish. Eat immediately - leaving it too long may cause the juice to leak out!


Simple Risotto

Much like searing, Risotto is more technique than specific recipe. It kinda remind me with fried rice, honestly, though of course,it is not... well, not precisely.

Anyway, you will need:
White rice. I use 3/4 litre for 2 portions. I think brown rice can be used, but I've yet to try it, so...
Stock. Use whatever you want - fish, poultry, beef, vegetable.
Onion.
Shallot.
Garlic.
Celery head.
Salt. Maybe pepper, I guess.
Vegetable oil, roughly 3 tbs.

Frying pan.
Saucepan, or whatever to hold the stock while it is heated.
Stove.

Process:
1. Heat the stock at separate pan, keep it low.
2. Wash the white rice
3. Chop the onion, shallot, garlic, and celery head.
4. Put the oil at the frying pan.
5. Turn on the stove - keep it low.
6. Saute the onion, shallot, garlic, chopped celery, until you can smell the aroma.
7. Add the rice. Stir it, until it is coated with oil.
8. Add a ladle of stock to the pan. Keep stirring the rice, until all the stock absorbed.
9. Keep adding stock, wait until it is absorbed, then add another ladle of stock... etcetera, until the rice is cooked, with a slight bite to the taste.
10. Do add pepper and salt if that's your preference.
11. Add a final ladle of stock, then put a lid on your pan for a minute or two. Turn off the stove.
12. Transfer to plate. Eat immediately.

Huh. Translating recipe ain't easy, I swear.
 
Chicken Bacon Bites - Biigoh
1O6ILtA.jpg

YpH0nwG.jpg
 
Black Bean Tortillas - Banichi
Black Bean Tortillas
1.5 cups/1 can cooked black beans
salsa (about a 1/2 cup)
shredded cheese (about a cup) x2
1.5 cups/1 can refried beans
handful spinach leaves, chopped (or frozen package, use less salsa due to liquid content)
Tortillas, 1 package from store

Mash the black beans with a fork or dough masher.
Add the salsa, mash some more.
Add the cheese x1, mash some more.
Add the refried beans, mash some more.
Add spinach, mash some more.
Refrigerate if you aren't using it at once.

Heat oven to 350 degrees.
On a baking sheet, over aluminum foil place a tortilla and large spoonful of Black Bean filling.
Spread the filling so it occupies half the tortilla.
Add any toppings like lettuce, chopped black olives, onions, spanish rice, whatever.
Sprinkle some shredded cheese over the filling.
Fold the tortilla over so it is a taco shape.
Repeat until the sheet is full of tortillas.
Bake 12 minutes.
 
Pan Fried Liver - Biigoh
So... tanuki can also use Nekraamancy!

- - -​

Pan Fried Liver
1 pack of chicken liver (8 ozs)
1 tablespoon of white flour
2 tablespoon of soy sauce
2 tablespoon of oil for the cooking
1 tablespoon of sliced ginger
3 spring-onions (thinly sliced)
1 handful of cilantro (sliced or shredded by hand)

1 - Marinate your liver in the flour and soy sauce for a few minutes
2 - heat your frying pan or wok on medium to high heat, with 2 tablespoon of oil
3 - toss in the liver with its marinate of flour and soy sauce
4 - fry fry for 1 or so minutes, until the liver outside is brown and inside is pink
5 - lower the heat to medium, and add in ginger and spring onions
6 - fry fry for 2 or so minutes, make sure that the inside of the liver stays pink, and not bloody
7 - take off heat and garnish with cilantro
 
Maple Bourbon Bacon Jam - Snake/Eater
Maple Bourbon Bacon Jam

Prep Time: 10 minutes Cook Time: 1 hour 50 minutes Total Time: 2 hoursServings: 1
A sweet, salty, smoky, spicy and down right tasty bacon jam that is the definition of umami! This bacon jam goes well on toast for breakfast and makes for a great condiment in sandwiches and burgers of all sorts!

ingredients

  • 1 pound thick smoked bacon, cut into 1 inch pieces
  • 1 large onion, sliced
  • 4 cloves garlic, chopped
  • 1/4 cup cider vinegar
  • 3/4 cup coffee (brewed)
  • 1/4 cup brown sugar
  • 1/4 cup maple syrup
  • 1/4 cup bourbon
  • 1-2 chipotle chilis in adobo, chopped
  • 1/2 teaspoon cumin
  • pepper to taste
directions

  1. Cook the bacon in a large sauce pan an over medium heat until the fat has rendered and the bacon starts to get crispy and set aside, reserving 1 tablespoon of the grease in the pan.
  2. Add the onions and saute until tender, about 5-7 minutes.
  3. Add the garlic and saute until fragrant, about a minute.
  4. Add the vinegar and deglaze the pan.
  5. Add the coffee, brown sugar, maple syrup, bourbon, bacon, chipotle chilies, cumin and pepper, reduce the heat and simmer until reduced to a syrupy consistency, about 1-2 hours.
  6. Process the jam in a food processor to smooth it out a bit but not too much as you want to have the texture of the bacon.
  7. If you do not finish it all in one sitting, store it in a sealed container in the fridge for up to 4 weeks.
 
Last edited:
Bacon Cheeseburger Poptarts - Snake/Eater
Bacon Cheeseburger Poptarts

Ingredients
Bacon Onion Jam

1 lb bacon, diced
2 medium onions, diced
1/4 cup brown sugar
1/3 cup strong coffee
1/2 cup water
1 Tbsp balsamic vinegar

Burger
1 lb extra lean ground beef
1/4 cup onion, diced
2 cloves garlic, minced
salt & pepper
1/4 tsp garlic powder
1/4 tsp onion powder

Pastry
2 cups flour
1 Tbsp sugar
pinch salt
1 cup butter, cold
1 egg
2 - 4 Tbsp buttermilk

Extras
cheese
1 egg, beaten
sesame seeds, toasted

Directions
Prepare Bacon Onion Jam - in a large frying pan, fry bacon until it is done but not crispy. Remove cooked bacon and set aside. Drain off all but about a tablespoon of the bacon grease. Add the onions to the pan.
Cook and stir until onions begin to soften, about 5 minutes.
Turn heat to low and add sugar, coffee, water, and the bacon back to the pan.
Let simmer until mixture is thick and reduced, like jam, about 30 minutes, stirring approx every 5 minutes or so to prevent burning.
baconcheeseburgerpoptart.jpg


Remove from heat and stir in the balsamic vinegar. If you are happy with the texture then leave as is, if it seems to thick/chunky then pulse briefly (two or three times) in a blender or food processor to thin it down (see photo below).
baconcheeseburgerpoptart2.jpg


You can use this immediately or refrigerate for up to a week. (For the purpose of using in this recipe - chill in fridge until ready to use.)
Prepare Burger mixture - In the frying pan you cooked the Bacon Onion Jam in, cook the beef, onion, and garlic until beef is no longer pink. Sprinkle with spices and stir to evenly distribute.
When everything is cooked, drain the beef to remove any excess liquid.
baconcheeseburgerpoptart3.jpg


Let cool. (You can place in fridge to accelerate this process)
Prepare Pastry - In a large mixing bowl, stir together flour, sugar, and salt. Cut in the cold butter using a pastry blender or 2 butter knives. (You can also pulse this all together in a blender or food processor). Mixture should resemble coarse crumbs.
Beat together the egg and 2 Tbsp buttermilk. Using a fork, stir the wet ingredients into the dry ingredients until dough comes together. (You may need to add more buttermilk, a tablespoon at a time, until desired consistency is reached.)
Pat dough into a ball and divide into 4.
baconcheeseburgerpoptart7.jpg


Cover and let rest for at least 10 - 15 minutes.
Assemble Poptarts - Preheat oven to 350.
Line a cookie sheet with parchment paper, set aside.
Roll out one quarter of the dough into a 12 X 8 rectangle. Cut out 8, 3 X 4 little rectangles. (In the photo below you can see one of my Poptarts is a little smaller than the others. I didn't quite cut my dough into equal quarters so this quarter had a little less dough than the others!)
Using a pastry or basting brush, brush each rectangle with a little of the beaten egg, being sure to get right up to the edge.
baconcheeseburgerpoptart8.jpg


Top 4 of the rectangles with a generous spoonful of the cooled hamburger mixture.
Then top with a spoonful of the Bacon Onion Jam. (In the photo below I also topped some with Sue's Rhubarb Relish {we'll share that recipe with you soon!}- middle one, some with just bacon bits - beside the little one, and left one plain -the tiny one on the side.) Be careful to leave about 1/4 inch border around the outside so you can seal the Poptart.
baconcheeseburgerpoptart9.jpg


Now top with a little bit of cheese. Again, don't go too crazy! You don't want your Poptart to explode apart.
baconcheeseburgerpoptart11.jpg


Flip the bottom piece of dough up over the top piece, so the eggy side is facing in, and lightly press together around the edges.
Using a fork, press the edges firmly together. Then poke a couple of holes on top for the steam to escape.
baconcheeseburgerpoptart12.jpg


Brush the tops of the Poptarts with more beaten egg and then sprinkle generously with toasted sesame seeds.
baconcheeseburgerpoptart13.jpg


Repeat with remaining pieces of dough until you have used it all up. I got 16 Poptarts total with some of the hamburger filling and bacon jam left over. (You could probably make another batch of dough and get another dozen or so out of the filling.) Place all Poptarts onto prepared cookie sheet.
baconcheeseburgerpoptart14.jpg


Bake at 350 until tops are golden brown and pastry is puffed, about 25 - 35 minutes.
baconcheeseburgerpoptart15.jpg


Let cool about 5 - 10 minutes before serving. (You can also freeze these and then reheat them in the oven when you want to serve them. I did 350 for about 20 minutes and they were just like when I first made them.)
baconcheeseburgerpoptart16a.jpg


I could just look at these all day. They're so pretty.
baconcheeseburgerpoptart18a.jpg


Want a bite?
I'm even willing to share...

baconcheeseburgerpoptart20a.jpg


You can't see the melty cheese...but it's in there.

baconcheeseburgerpoptart21a.jpg


We loved the Bacon Onion Jam and the Rhubarb Relish in these. You could also simplify things and top your hamburger with a little mustard and ketchup or even a small bit of chopped pickles.
Go crazy!
Call it a Poptart or whatever you want...but one thing is for sure, you will call it delicious!

We're sharing at these fab linky parties! Be sure to check them out! -
 
Last edited:
Mini Cheeseburger Bites - Snake/Eater
Mini Cheeseburger Bites


Here's a recipe when you're looking for an appetizer or snack to serve your family or company. Enjoy!

1 package refrigerator garlic crescent rolls
1 pound hamburger
1/2 cup diced onion
1 cup frozen mixed vegetables
2 tablespoons Worcestershire sauce
1/2 teaspoon seasoned salt
1/4 teaspoon black ground pepper
6 slices American cheese, quartered

Preheat oven to 375 degrees. In large skillet, brown hamburger. Add onion, mixed vegetables, Worcestershire sauce, seasoned salt and black pepper. Cook on medium heat until onion is tender and vegetables have cooked through, about 10 minutes.

Meanwhile, prepare mini tart pan. Spray with cooking oil. Roll out crescent and press together at seams. Divide and cut into 24 squares. Press each square into the tart cups, pressing along the bottom and sides. Spoon meat mixture into each cup. Place cheese quarters on top of each prepared cup. Bake for 15-20 minutes until crust is golden brown. Makes 24 bites.
 
Steamed Pork & Salt Egg - Biigoh
So, while I was making curry on this nice day... I was reminded of something my mom used to make when I was younger....

It's incredible simple and a staple of chinese home-cooking.

Ingredients
Some mince pork (about 80 to 100 grams)
2 eggs
Some green onions (chopped)
1 salted duck egg (optional) (make sure shell is washed clean, before breaking open the shell)
A pinch of salt
Some ground pepper (white or black is fine)
1/2 table spoon of soy sauce
1 table spoon of chinese cooking wine (or sherry) (optional)

Step 1 - Marinate the mince pork with salt, pepper and soy sauce. You can also add the cooking wine or sherry if you have that. Marinate for 10 or so minutes.
Step 2 - Beat the eggs
Step 3 - Add the green onions and eggs into meat
Step 4 - Mix it up well
Step 5 - Transfer mixture into steaming bowl/dish, recommend a shallow ceremic bowl (put salted duck egg on top of egg/meat mixture)
Step 6 - Get your steaming action on! by boiling water in pot and then putting in the ceremic bowl into boiling water.
Step 7 - Cover and steam for 6-7 minutes.
Step 8 - Check to make sure the meat in the center is cooked then take it out! Be careful, it'll be VERY hot.
Step 9 - Serve with a sprinkle of sesame oil and some green onions.
 
Pork Chops - CptTagon
Recipe for pork chops covered in buttermilk and Parmesan cheese.
Dip chops in buttermilk; then in bread crumbs.
(If meat is tough, let soak in buttermilk all day)
Put on cookie sheet; sprinkle w/garlic salt and Parmesan cheese
Bake at 400 F for 45 minutes (or longer until brown)
Don't turn the chops!
Spray pan first
 
Borscht - Seeing_Octarine
A cooking thread? Don't mind if I do! Have some delicious Eastern European cuisine~

Borscht

beetborscht.jpg


(note that all the following weights are approximate; a precision dish this ain't)

1.1kg of beetroot
1.1kg of cheap beef (chuck steak is recommended and typical, but you can even use ox heart if you don't mind it remaining chewy)
450g potato
300g carrot
150g onion
1 tsp minced garlic
cracked pepper
water
half a green cabbage
300g sour cream
20g fresh dill

Peel the beetroot and potato.
Cut the beetroot, beef, potato, carrot, and onion into about 1.5cm cubes.
Add the beetroot, beef, potato, carrot, onion, garlic and pepper to a big saucepan, and just barely cover with water. Careful not to add too much.
Cover and set to just simmering for around 3 hours or so.
Shred and add the cabbage, and continue to simmer for another 20 minutes or so until the cabbage is properly wilted/cooked.
Serve hot with a dollop of sour cream and a sprinkling of dill, as pictured.

Makes about 5 full noodle bowls of the stuff, totaling to around 16700kJ assuming full fat sour cream. Yes, I measure that sort of thing.

There are a ridiculous number of regional variations of borscht. This just happens to be the one I put together after browsing around the net for a while. That's a stock photo too, but it appears to be similar to what this recipe turns out as, so this version is probably vaguely Ukrainian. About the only thing the variations have in common is that it's a beetroot based stew. Most everything else is up to personal preference. It's incredibly easy to make vegetarian if you want just by omitting the beef, and doing so is probably advisable if you want to serve it cold. Also, as you may be able to tell from the cooking directions, I'm laaaaazy.
 
Last edited:
Family Chili Recipe - Garahs
I got this from a coworker. Their family is from the south. I'm trying it out tonight.

family chili recipe
Ingredients (You can play around with some that you do not like)
Chili Seasoning:
•1/2 tablespoon of ground cumin
•1/2 tablespoon of dried oregano
•1 tablespoon chili powder
•1/2 teaspoon of Cajun seasoning (Slap your mama) *yes that is a real spice name
Chili:
•2 tablespoons olive oil
•1-1/2 cups of chopped yellow onion
•1 cup chopped green bell pepper
•1 (7 ounce) can of chopped green chiles or up to 1/4 cup of jalapeno peppers, or to taste
•2 pounds ground chuck
•3 garlic cloves, minced
•1 tablespoon of granulated sugar
•2 tablespoons of Worcestershire sauce
•2 teaspoons of hot sauce, or to taste
•1 (28 ounce) can of whole tomatoes, undrained, chopped
•1 (14.5-ounce) can diced tomatoes, undrained
•2 cups beef stock or broth
•2 bay leaves
•3 (15 ounce) cans of light kidney beans, drained and rinsed, divided
•Kosher salt and freshly cracked black pepper, to taste
Instructions
Mix together the chili seasonings; set aside. Heat the oil in a large heavy bottomed soup pot over medium high heat. Add the onion, bell pepper, and green chilies or jalapenos; saute until tender, about 5 minutes. Add the ground beef and cook for about 10 minutes or until meat is no longer pink. Add the garlic and cook another minute. Drain off excess fat.
Add the chili seasonings, sugar, Worcestershire, hot sauce, tomatoes, beef stock and bay leaves; bring to a boil. Reduce heat and simmer, uncovered, for about 40 minutes or until liquid is significantly reduced. Drain one can of the kidney beans, mash and add to the chili. Drain and rinse the remaining two cans of beans, add to the chili, taste, season with salt and pepper and continue cooking on a low simmer, about 20 minutes longer. Stir, taste and adjust seasonings, as needed.

***All recipes depend on your ingredients, our family uses the hottest of the hot and some extra fat but that is where the real good flavor is:
Chili is by nature spicy, but may be adjusted to a milder flavor by eliminating any seasonings containing hot pepper (Cajun, Creole, hot sauces), reducing dried chili powder and substituting canned mild green chilies for any hot peppers. Always start with a lesser amount of any seasonings, taste and adjust.
May also substitute a combination of 1 pound ground chuck and 1 pound of raw sausage, such as Italian sausage or Mexican chorizo, if desired. Can also use a leaner ground beef or ground turkey, but understand that some of the flavor will be lost due to the fat loss. Substitute habanero, scotch bonnet, or serrano peppers, or your own favorite hot chile pepper, depending on heat level desired.
***I know you like the Slow Cooker***
Crockpot: Brown veggies and ground beef in skillet as above and drain. Transfer to slow cooker and add the remaining ingredients. Stir well, cover and cook on high for 4 to 5 hours, low 7 to 8 hours.
 
Tim Tam Balls - NovemberBlues
This place could use more desserts. Especially chocolate ones.

Tim Tam Balls - by the One Pot Chef Show

[Edit: I almost forgot the image!

maxresdefault.jpg

Now that's better.]

Equipment:
  • Food Processor; if you do not have a food a separate set of instructions will be just down below
  • A bowl
  • A plate
Ingredients:
  • 125g of Cream Cheese (at room temperature)
  • 200g Packet of Tim Tam Biscuits (or similar chocolate biscuits / cookies)
  • 1/2 Cup of Chocolate Sprinkles
Preparation time: ~15 mins
Chill time: ~20 mins


Instructions:
  1. Place chocolate sprinkles inside the bowl, and set aside
  2. Place cream cheese inside food processor
  3. Place Tim Tams inside food processor
  4. Blitz until all is blended into a single chocolatey mixture
  5. Take a tea spoon of the mixture and roll with hands into a ball
  6. Roll the ball on the chocolate sprinkles inside the bowl until totally covered
  7. Put on the plate
  8. Repeat until no mixture left
  9. Place plate inside the fridge and chill for roughly 20 minutes
  10. Take out and enjoy!
Instructions (no food processor; will need three bowls):
  1. Place chocolate sprinkles inside the bowl, and set aside
  2. Finely crush the Tim Tams into 2nd bowl
  3. With another bowl place the cream cheese inside
  4. Place finely crushed Tim Tams inside 3rd bowl
  5. Mix until all is blended into a single chocolatey mixture
  6. Take a tea spoon of the mixture and roll with hands into a ball
  7. Roll the ball on the chocolate sprinkles inside the bowl until totally covered
  8. Put on the plate
  9. Repeat until no mixture left
  10. Place plate inside the fridge and chill for roughly 20 minutes
  11. Take out and enjoy!

It is super easy, and I tried it myself, so I can say its good. Best to eat it as a snack with something else, perhaps Earl Gray Tea.
 
Last edited:
Simple Risotto - Evillevi
Sorry if this is not suppose to be here, but does anyone know the tips of cooking rissoto. I tried a recipe of using Rissoto that I'll simplify as

1) Pour stock ,1 or 2, ladle at a time into a pan with rice until it's cooked and creamy.
1.1) Pour stock as needed to keep it wet (?)
1.2) Stir it as needed (?)
2) Add stuff that you like at the end to make it taste nice.

So my problem is what does it mean by cooked until creamy, at what point specifically do I need to pour more stock and how often should I stir?

Thanks for reading this if nothing else and sorry if I'm not supposed to post stuff like this here.
 
Souling Cake - TheJackinati275
Here we go...

-Twiddles copy-paste fingers-

(From My SB Cookbook post.)

****

It's nearing Halloween.

Have you ever found yourself pondering what to give the little shits/villainous bastards cute trick-or-treaters?

Ponder no more, my dear fellow... give them some Halloween love with some SOUL CAKE!

Why yes, SOUL CAKE is the name of this recipe. Made for over 400 years (And maybe longer), this little treat would eventually lead to the tradition of little bastards cute kids running around trick-or-treating.

Avoid yourself the scorn (And possibly house TP-ing and Eggings) of the children and give them some SOUL CAKE.

Do you wish to know how to make SOUL CAKE?

Then I shall teach you...

-Proceeds to copy and paste-

****
Souling Cake Recipe
Makes 14 large 'cakes'

Recipe Ingredients:
340g plain flour (sifted)
170g sugar
170g butter (softened & diced)
1/2 tsp ground cinnamon
1/2 tsp ground mixed spice
1/2 tsp ground nutmeg
1 egg (beaten)
2 tsp of white wine vinegar
Preheat the oven to 200C and grease 2 flat baking trays

Thoroughly mix all the dry ingredients into a mixing bowl – sifted flour, spices, and sugar. Rub in the diced butter until the mixture resembles fine breadcrumbs. Add in the beaten egg and white wine vinegar and mix with a wooden spoon until a firm dough is made. Then cover it and put it in the fridge for 20 minutes.

Flour a working surface and roll out the dough to 7mm thick and using a large round pastry cutter cut into rounds, (optional: use a straight edge to press into, and then draw a cross shape, in the top of the dough). Place these rounds on the greased baking tray and bake in the oven for 15 to 20 minutes at 200C until slightly coloured. Serve warm or cold.

****
It's less a cake and more a biscuit... but it is fucking awesome!

Just look at this... I only have two left in the photo because I was too busy fucking eating them all!

soul%20cake_zpso8hn1ysa.jpg


10/10... would sell my Soul for more Soul Cakes again!
 
Eggs, Eggs, Eggs - Malaquez
Just found this thread, and I gotta share. I love eggs. Always have. Boiled, scrambled, fried; I love eggs in every way.
Thus, I'm making this post for all the egg recipes I know. Enjoy!
Equipment will be standardised as:
1) Medium sized pan, preferably non-stick.
2) Rubber spatula.
unless stated otherwise.
~~~~~
Let's start off simple with fried eggs.

Ingredients:
Cooking oil e.g. sunflower, canola, etc.
1 egg.
Salt and pepper.

1) Crack the egg into a bowl first, to make it easier to slide onto the pan.
2) Heat the pan to med-high, and add your oil.
3) When the pan is hot, slide the egg onto the pan. Be careful not to crack the yolk here.
4) You will notice that the egg white has two 'layers'. Using the spatula, carefully spread the white so that it's in contact with the pan. This let's the egg cook uniformly.
5) After a minute or so, when the white goes opaque, cover the pan with a lid. This steams the yolk.
6) Give it another minute, and voila! Fried egg, with a runny yolk! Season with salt and pepper to taste.

A variation of this is the over-easy.
Just follow the above steps, but after step 4, let the egg cook a bit more until you can move it around the pan. Now, very carefully, slide the spatula under the egg and slowly flip it. Let the egg cook like that for 30 seconds or so, and done! Season to taste.
~~~~~~
Next, omelettes. My favourite. :D

Ingredients:
Oil.
2-3 eggs.
Salt & pepper.
Any kind of cheese you have on hand.

1) Crack eggs into a bowl. Whisk until you don't see any egg white.
2) Add pepper. DO NOT ADD SALT AT THIS STAGE. The salt makes the eggs watery.
3) Heat the pan to med-high and add oil.
4) When the pan is heated, add your eggs.
5) You can see now, that the egg isn't cooking all at once. Only the bottom, which is in contact with the heat, is cooking. Using the spatula, pull in the sides of the cooked egg and tilt the pan to let the uncooked egg get in contact with the heat.
6) Repeat step 5 until the egg is set. Season to taste.
7) Add your cheese onto one side of the omelette. Then, fold the other half of the omelette to cover the cheese. At this point, turn the heat to low and let the omelette sit for another 30 seconds to melt the cheese. Tada! A fluffy, cheesy omelette!
Of course, the toppings can change. Cheese is just my topping of choice.

A fancier option is the buffet omelette. Basically, you cook off whatever ingredients you want to put inside the omelette e.g. mushrooms, bacon, etc. Then, either:
A) Pour the egg over the ingredients and follow the steps above, or
B) take the ingredients out of the pan, cook the egg according to the steps above but replace the cheese with your ingredients.
~~~~~~
Onto, boiled eggs.
So, boiling eggs are pretty simple. Cold water-filled saucepan on the hob. Put egg(s) in. Heat until boiling. Turn off the heat, and cover with a lid.
Now, you have a couple of options.
1) Let sit for 3 minutes for really runny soft-boiled eggs,
2) 5-6 minutes for a a firmer soft-boiled egg with a creamy yolk, or
3) 10 minutes for hard-boiled eggs.
Scoop out the eggs and immediately shock them in ice water. That stops the cooking process. Peel the eggs and enjoy!

If you wanna go the extra mile, here's something you can do. This is best done with the eggs boiled for 5-6 minutes.
1) Mix together equal parts water and sake, and half that of soy sauce, mirin and sugar e.g. 1 cup of water and sake, half cup of soy sauce, mirin and sugar. Mix until sugar dissolves.
2) Place peeled eggs into container. Pour the mixture over the eggs. Try to get a container that let's the eggs stay submerged e.g. a pitcher. Cover and let it marinade in the fridge for a minimum of 4 hours and up to 12 hours. Reheat as needed.
This is great for ramen, or any soupy noodle dish.
~~~~~~
Well, that's all folks! Hope you enjoy the recipes! :)
 
Mexican Bread - Imabot
Today I'll share a recepie for one my favorite baking product.

Mexican Bread ( I not from Mexico it just called like that):

Ingredients:

3 Eggs

1 Spoon of Sugar

120 ml of Oil.

200 g of Corn from a can

100 g of grated Cheddar cheese

One half of Red Paprika cut into small pieces.

One half of Green Paprika cut into tiny pieces.

200 grams of beacon or or ham also cut into small pieces.

200 grams of wheat flour

Half spoon of bakig soda

Half spoon of salt.

Spoon of Paprika powder (spiciness up to own preference)

Recepie:

1.We take corn and mix with half of the milk for a short while in food processor on a bowl with a mixer unltil corn will turn into smaller pieces.

2. In separate bowl we mix oil, eggs, sugar and rest of the milk.

3. We add bacon, cheese, paprica, corn mixed with milk and carefully mix it all together.

4. We slowly add Baking Soda, Salt and Flour while mixing all ingredients untill it turn into doulgh.

5. Put dough into a baking form.

6. Bake it in a oven in temperature of 175°C for around 45-50 minutes.

7. Bon appetite.
 
Zelretch's Baked Alaska - Student of Zelretch
Zelretch's Baked Alaska
l24uVN5.jpg
zA4bTMc.jpg
Zelretch's Baked alaska
Ingredients:
any non-olive food-grade oil, for brushing
1 pint raspberry sorbet, softened
1 pint vanilla ice cream, softened
1 quart chocolate ice cream, softened
1 cup chocolate wafer crumbs (about 17 crushed wafers)
2/3 loaf pound cake
For the Meringue:
1 cup egg whites (about 8 large), at room temperature
1 tsp of cream of tartar
1 cup sugar

Make the ice cream cake: Brush a 3-quart bowl with oil; line completely with plastic wrap. Fill the bowl with scoops of the sorbet, vanilla ice cream and half of the chocolate ice cream, alternating small and large scoops to create a mosaic of colors and shapes.Cover the ice cream with the wrap; press down to close the air gaps and even out the surface. Remove the plastic wrap, sprinkle the ice cream with the wafer crumbs and re-cover with the plastic wrap, pressing gently. Freeze until set (at least 20 minutes.)
Remove the wrap and spread the remaining chocolate ice cream in an even layer on top of the crumbs. Cut the pound cake into 1/2 to one inch-thick slices; completely cover the ice cream with the slices, trimming as needed (you'll use about two-thirds of the cake, depending on bowl used). Cover with fresh plastic wrap and freeze until firm, at least 2 hours is recommended.
Make the meringue: Whip the egg whites and cream of tartar in a large bowl with a mixer on medium-high speed until foamy, about 2 minutes (if by hand, you're going to have a bad time.) Gradually beat in the sugar in at high speed, until the whites are glossy and hold stiff peaks.
Remove the top layer of plastic wrap, then invert the cake onto a parchment-lined baking sheet. (If necessary, let the cake stand overturned until it slips out.) Remove the rest of the plastic wrap and cover the ice cream completely with the meringue, making the dome-shaped top slightly thicker than the sides. Form whatever designs you are capable of in the meringue using the back of a spoon. Freeze for at least 3 more hours (if using a torch, you can switch this and the next step if you chose.)
If you do not have a cooking torch: Preheat the oven to 500 degrees. Bake the cake until the meringue peaks are golden, about 4 minutes.
OR brown the meringue with a blowtorch, as little or much as you desire; this can be artistic in and of its own merit. Let the cake soften at room temperature for 5 to 10 minutes before slicing. Freeze any leftovers. (if you have any, you're a heretic.)
 
Glaze for cookies, cakes, and other pastries - NinjaMAster
Glaze for cookies, cakes, and other pastries.

Mix lemon juice with powdered sugar until thick, or to taste. Thinner mixes may require more applications. Place baked goods on a drying rack with wax-paper underneath the rack. Use a basting brush to apply the glaze to the baked product. Wait an hour between layers, and until dry before moving them. When storing glazed cookies, place wax-paper between layers of cookies to prevent sticking. Different fruit juices may be used, but some are overpowered by the sugar, or overpower the baked goods' taste.

Key lime pie.

Mix sweetened condensed milk with lime juice to taste. Pour into a gram cracker crust, cover, and place in the fridge overnight. Whipped cream can be added to firm up the pie, and green food coloring can make it look the correct color.
 
THE CHUNKY JOE - Konamikode
Are you broke? Maybe just a bit lazy? Or you legitimately don't have the time to cook?

shot0028.png

Well that's fine, because Kona's here to help you out!

tumblr_m2xmls1yEZ1ron8qy.jpg

I specialize in cheap, bulked out cooking that a single person can eat for days at a time with each meal loaded with enough calories to get you HUEG. The following recipes are not intended for those living a sedentary lifestyle.

No, that's a lie. You can totally eat the stuff I make by supplementing with mild exercise, correctly sizing your portions and-

BULKING YOUR MEAL EVEN FURTHER, DOOOOOYRAAAAA!!!
(With healthy, but cheap sides)

KONA'S HOT BLOODED SHOUNEN RECIPE # 1
THE CHUNKY JOE


---

Fair warning, I do most of my cooking by feel and this is generally how you get the best taste out of something. So don't be afraid to experiment a bit, look, smell, and most importantly taste every so often. The following is a rough guideline for my Chunky Joe recipe-

Yield: 6-12 Servings
By Cooking Order

Part 1: These numbers will give you a solid base to work with.
3 LBs of Ground Beef (The fatter, the better it will taste and the less you'll have to eat to feel full)
1 Tablespoon of Salt (I'm usually pretty conservative when it comes to sodium)
1 1/2 Large Yellow Onion
6 Pieces of Chopped Garlic
2 Cups of Rehydrated Shiitake Mushroom Chunks*****
The Shiitake is what makes this recipe so good. The extra 'chunk' and texture it provides is amazing and also acts as a sponge that soaks up all the flavorful juice you'll have leftover from cooking the meat and veg!
2-3 Tablespoons of Brown Sugar

Part 2: This is where you get to start playing around with the sauce, proper.
Fuckton of Ground Pepper (Get a grinder and fresh peppercorns. You won't regret it)
Enough Ketchup to juuust cover the meat
A spoonful of Dijon Mustard
(The above is all you really need)

Kona's personal touches
A Dash of Soy Sauce
Crushed red pepper flakes to taste
Jalapenos to taste
Sriracha
Tabasco
Half a shot of whiskey)

Directions: HOW DO?
Prep: Have your meat defrosted and start laying out everything you'll need. You'll need a large pot + frying pan if you want to do this right, or just a big sauce pan if you're being lazy :p

I generally prep, cook, and clean all at the same time, but that can take a bit of practice for people less used to maximizing their efficiency in the kitchen. So instead, just lay whatever you need beforehand in the order you'll be using them :3

Step 1: Make sure the pan is slightly smoking before you put the oil in and give said oil about ten-fifteen seconds to get up to temp

The idea here is to minimize the meat that sticks to the pan. The hot oil will flash cook the meat so less of it sticks when it hits the pan itself!

Step 2: You're going to want to set the burner at medium highish. Carefully spoon in the ground beef and begin mixing and crumbling it up. Ground beef doesn't take long to brown so don't be afraid to mess with it. Add the salt in while you're doing this.

Step 3: Transfer the meat into your pot, don't turn on the burner yet.
(I normally do not drain the fat when I do this, but feel free to do so to get something a bit healthier :p)

Step 4: There should be a good amount of grease still left in the pan, throw in your diced onions at the same level of heat followed by your garlic and mushrooms after a minute and cook them up for another minute longer to get the onions oiled up and shiny!

The key to getting a nice cook on onions is to hit what I call the sweet spot. An onion makes a sexy little hissing noise when it hits the pan and as long as you hear that, you know that you aren't overcooking the onion.

Step 5: Transfer that over into the pot where a little bit of grease and leftover moisture should have formed at the bottom of the pot. Turn on the heat to a nice medium and start mixing everything together followed quickly by the brown sugar.

You're going to want to let the brown sugar melt in a bit before you start adding the other sauces. Makes it way easier to mix and you'll get a more accurate tasting of what your final product will be like!

Step 6: Just start adding the sauces in the order listed above and mix everything up. You'll want to stir occasionally while the sauce warms up.

Step 7: Once your sloppy joe mix starts to simmer and bubble softly, you're pretty much done. Turn off the heat, mix once more and put a lid on to keep it warm.

Step 8: Serve with a side of your choice! Chunky Joe goes well with pretty much any carb and veg combination!

---

Notes: The mix will stay good without being put in the fridge for about two days as long as you keep it covered. I haven't tried it yet, but you could probably make this recipe still taste pretty decent if you decide to use a slow cooker!

This recipe can also act as a vegan style sloppy joe by replacing the meat with more shiitake and adding in a bell pepper or two!
 
HOT SWAPPABLE FILLER STEW - Konamikode
YOOOOOOSH! THE TIME HAS COME FOR THE NEXT RECIPE MY MOST YOUTHFUL STUDENT!

KONA'S HOT BLOODED SHOUNEN RECIPE # 2
HOT SWAPPABLE FILLER STEW: TACTICAL AS SHIT EDITION


-----

Oftentimes the fridge and pantry feel like they are empty, or you may feel that a favorite recipe of yours is completely defunct because you happen to be missing one or two 'key' ingredients. Anyone can make a cheap, bulky meal without a ton of fancy ingredients to make something taste good. The 'recipe' today is less of a complete one, but a quick lesson on what works well enough together that you can just throw all of them into a crock pot / slow cooker and have a ready meal in about 4-8 hours depending on your cook setting.

Heavy Stews (Brown-Reddish in color)

Basic Recipe:
1 - 1.5 lbs Protein: You can use just about any kind of cheap cut of whatever animal you want
1 - 1.5 lbs of Potatoes: Get the cheap ass big ol brown ones (Russet). Really helps to bulk up a meal and the starch will help make the soup thicker
2-3 heaping cups of *Filler Veg/Grain*: Corn, canned tomato chunks, carrots, broccoli, mushrooms, beans*, rice, something that helps to fill up the gap
*Make sure to soak your beans for about 6-8 hours prior to cooking.
***TOXICITY WARNING: Kidney beans MUST BE COOKED AT BOILING TEMPS after being soaked for 10-15 minutes prior to being thrown into a slow cooker!
1 - 1 1/2 Large Onion
: Yellow onion is your cheapest option and they get pretty big. Not only does it add to the bulk of a meal, you get a lot of good veggie broth from this stuff!
3-5 Tablespoons of Dehydrated Beef Stock: Go to your local asian market and get yourself a huge bag of the stuff. It's cheap and it makes for fanfuckingtastic gravy mix.
Salt and Pepper to taste: Self explanatory
Water: The general rule of thumb for stews is just enough to cover it, but if you're going to be using beans or rice in the mix, add additional water.
Roux: A Roux is a mixture of some kind of oil (usually butter) and flour cooked up on a pan that you add either milk or meat broth to make a gravy or a sauce. For darker stews, don't worry about adding milk unless you like something creamier. Just cook a batch of about 1.5 - 2 cups of flour mixed in with half a cupish of oil in a pan for a minute until it gets bubbly. You can do this at the end of the cooking process when you get home and dump it into the stew mix and stir. Leave the cooker on high for about 20-30 minutes and you'll be ready to serve!

Gettin Fancy: Some other things you can dump in for a little zing
Bay Leaves: These things are amazing. Drop in 3-4 of these things to really bring out the flavors!
Actually Just Bay Leaves. Everything Else I decide to add, I do it on a whim to experiment: This*

Good Sides: Stew is great and all, but usually you want to eat something else along with it for greater satisfaction!
Carbs: Rice, noodles, or bread. Simple and clean. Think about adding dumplings for some extra 'heft'! Crackers are pretty nice too~

Light* Stews (White-Yellowish in color)
*Depends entirely if you decide to thicken up the soup base with a roux* towards the end of the cooking. If added you'll end up with a cream of chicken/mushroom/etc type of soup/stew rather than chicken noodle or something.

Basic Recipe:
Essentially the same as above minus a few things-
Protein: You'll probably want to use a bird here. I suppose you could do reptile? I usually use chicken or turkey thighs bone in with skin as this way you pretty much get bird stock with the type of cooking you are doing. It's hard to get flavor out of a breast. Cheap cuts of pork are pretty good here too, I tend to use bone in loin.
Beans:You want to use lighter colored beans if at all.
Tomato Based products: You could, but you'd probably be better off using something like pesto instead if you like Italian type flavoring.
Roux is optional: Sometimes you don't need something thick, but something light.
Don't use beef stock: No need for it. Just use salt and pepper to taste and a milk based roux if you want.

---

How to Cook

Step 1: Dump everything into a crock pot starting with your heavier veg followed by your meat, and top with your lighter stuff before throwing everything else in there.
Step 2: Cook on low for 8 hours or high for 4 hours
Step 3: Add your Roux to thicken if you want. Cook on high for 20-30 minutes after stirring.
Step 4: Ladle that shit into a bowl, grab your side of choice, and feast.
 
On Spring Onions - Biigoh
While this is not a recipe per se... it's something handy for cooking.

Spring onions aka Scallions or Green Onion.

I find that it helps after buying spring onions, to wash them when I get home and pat them dry.

After that, slice them thinly before patting them dry again.

Next, take a small plastic container and line the bottom with paper towels and refrigerate them.

This keeps them from wilting and going to waste if you're not going to use up an entire bunch all at once or quickly.
 
On Spring Onions - Malaquez
While this is not a recipe per se... it's something handy for cooking.

Spring onions aka Scallions or Green Onion.

I find that it helps after buying spring onions, to wash them when I get home and pat them dry.

After that, slice them thinly before patting them dry again.

Next, take a small plastic container and line the bottom with paper towels and refrigerate them.

This keeps them from wilting and going to waste if you're not going to use up an entire bunch all at once or quickly.
Oooh, nice.
Also adding on to this. You keep spring onion stalks in a vase of water to have 'infinite' green onions to use. Just snip off the green parts and they'll grow back.
 
Quick Ramen - Evillevi
Has anyone ever done anything with ramen noodles to make it better?
Boil the ramen noodles and drain it once it is sufficiently soft.

Cooked some chicken on medium with oil and finely sliced ginger (at a bit of water/oil as preferred to keep it moist and a bit saucelike). At enough soysause to brown the dish and some sugar at the last 5% of the frying stage (the point where the chicken is cooked to your preferences. I like it rare/raw-ish but you would probably be different. ).

Switch off the heat and add in the ramen noodles. Stir it well.

And done.
 
Back
Top